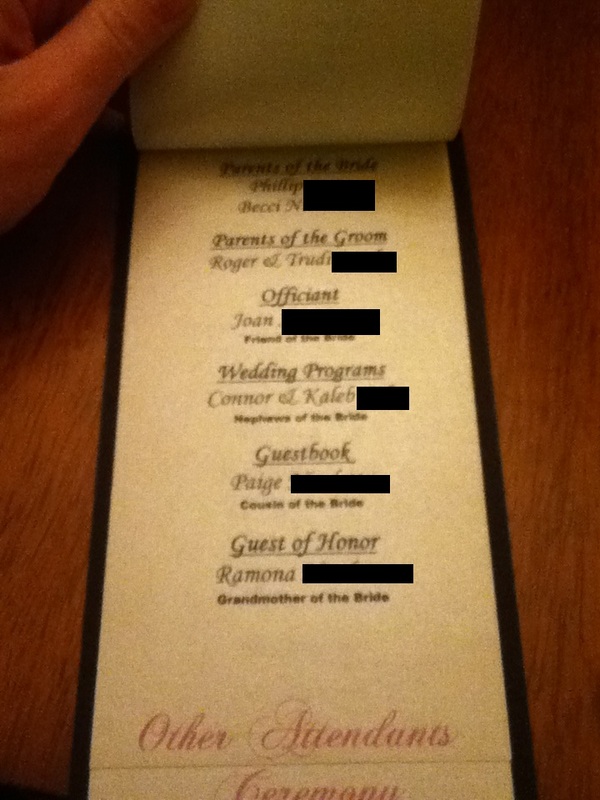
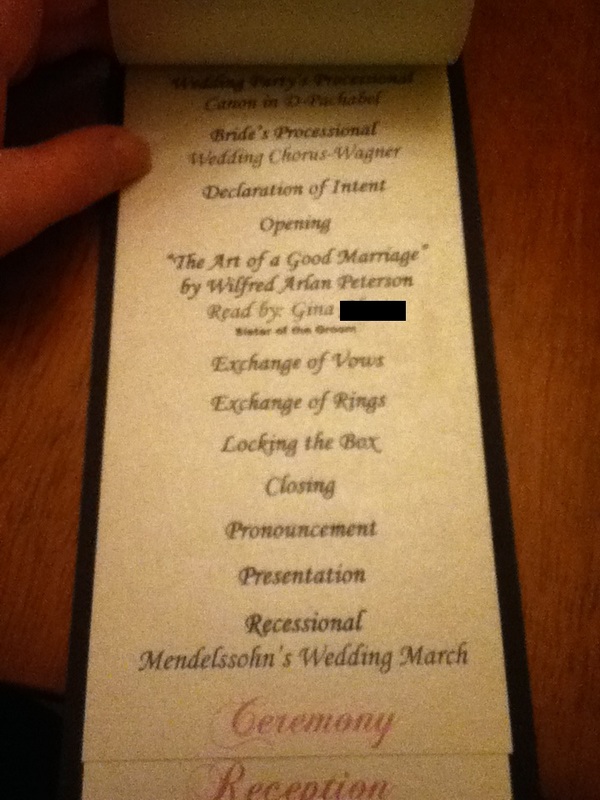
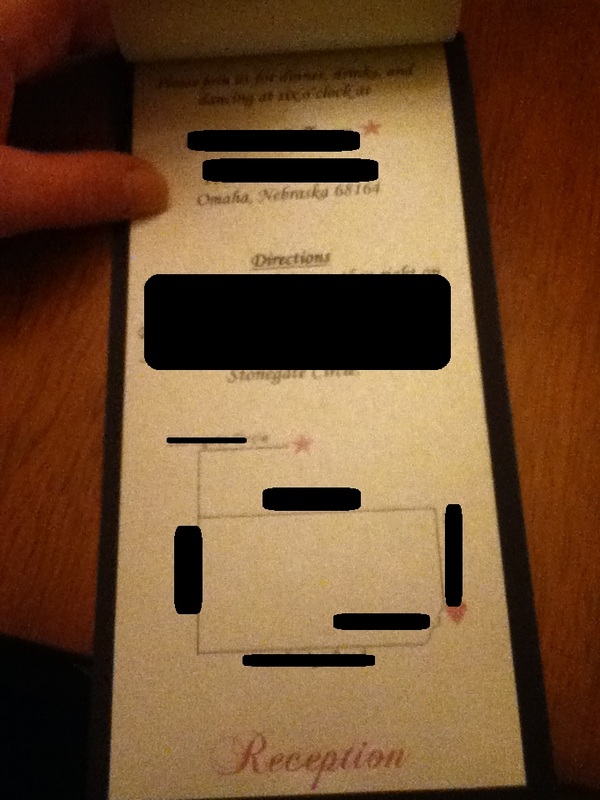
PROGRAMS!
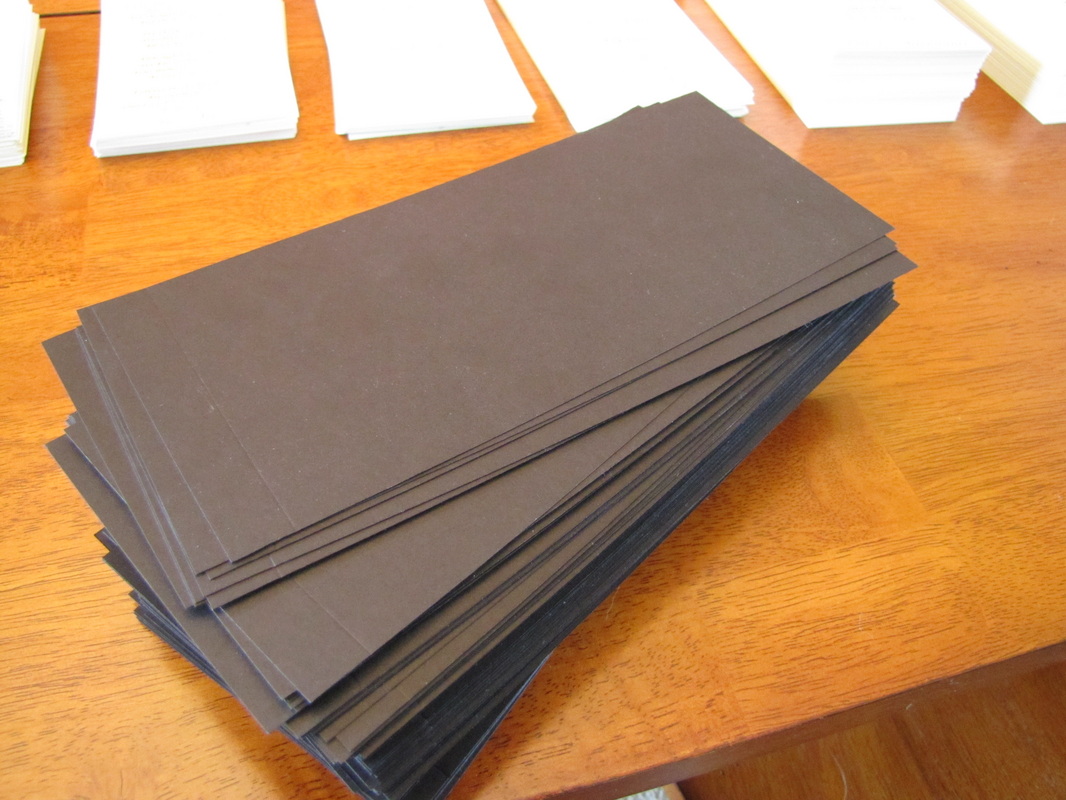
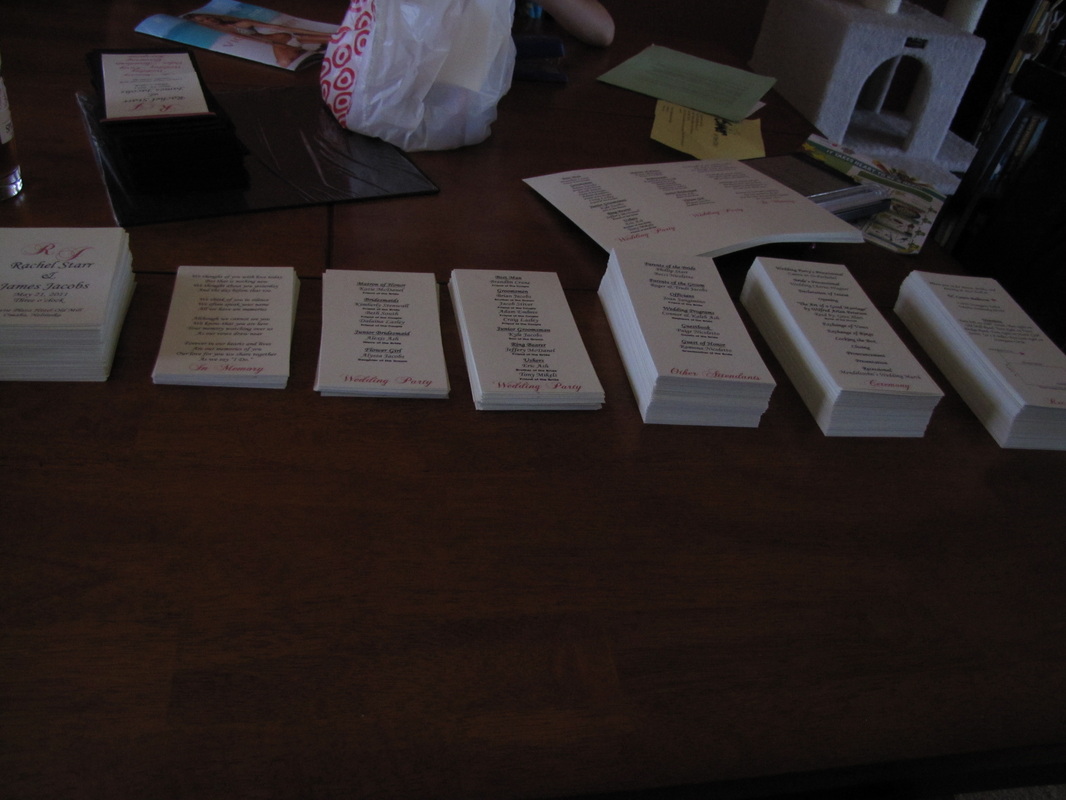
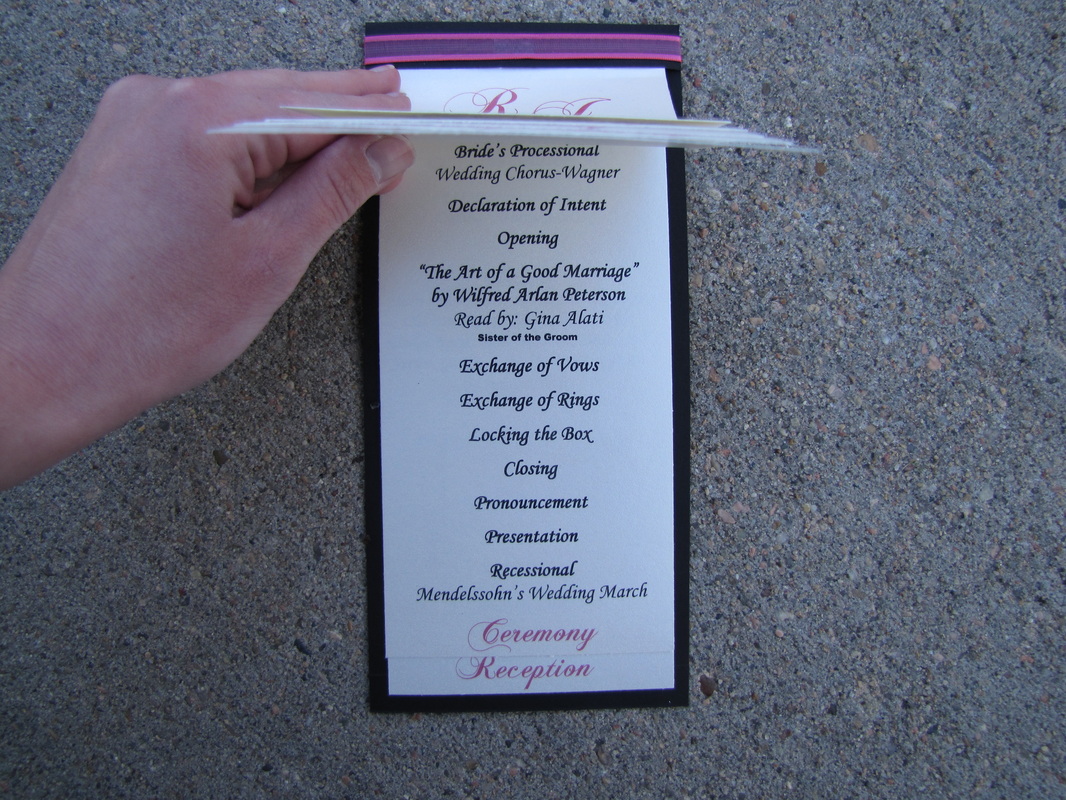
Okay, so I originally wanted to make the layered fans that spiral out, but we trialled it and it didn't really work, so I decided to go for a layered flat look. Jim had this idea of bringing the cardstock underneath the layers back over the top, which I didn't really care for the idea. I was just planning on stapling the suckers and gluing a pink bow on top and calling it good. Well, he was right. While I was googling for inspiration that was close to my idea, I came across something more similar to his idea, so we went with it. They turned out beautifully. One major downfall~we completely miscalculated how much paper we would need, so this ending up costing us much more than we has anticipated, HOWEVER, we still saved quite a bit of money by doing it ourselves. I had plenty of leftover black cardstock, and some leftover ribbon from the coloring books. We found this very pretty, shimmery paper that is 32 lb, so it is a little thicker than regular paper. We bought it at Office Depot. LOTS of it. I mean 5 or 6 trips worth and calling to put it on hold, as it is so popular with the brides making invitations (I learned this halfway through our program adventure). I designed the layers on the computer (THREE TIMES, as BOTH of my computers crashed. It's saved within 4 different emails now. lol). We printed it on regular paper first and made the necessary changes, just like we had done with the invitations. Once we got it lined up and measured out, Jim used his mad math/geometry skills and made a template for the black cardstock. He cut those and scored them. I printed off HUNDREDS AND HUNDREDS AND HUNDREDS of the tabs and cut those out. (it took me a month, no joke) Then Jim assembled them and stapled them together, measured out the ribbon and cut all of that up. I then used double-sided tape and put the ribbon on the top. Next to the invitations, this took us the longest...well..the love letter/wine box is up there too, but that's due to weather conditions and the inability to use a saw outside in Nebraska winter weather. :) We realized that one of the tabs was messed up after I had printed about 50 sheets, and that's after our printer destroyed another 50, and considering this paper wasn't the cheapest, I was pretty pissed off. :) BUT, I must say, I do love how these turned out, and I wouldn't take it back. :)
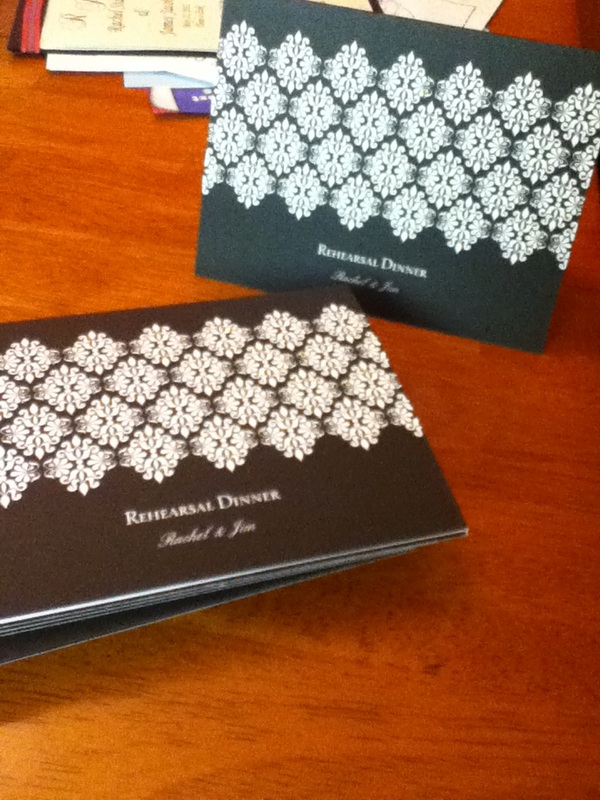
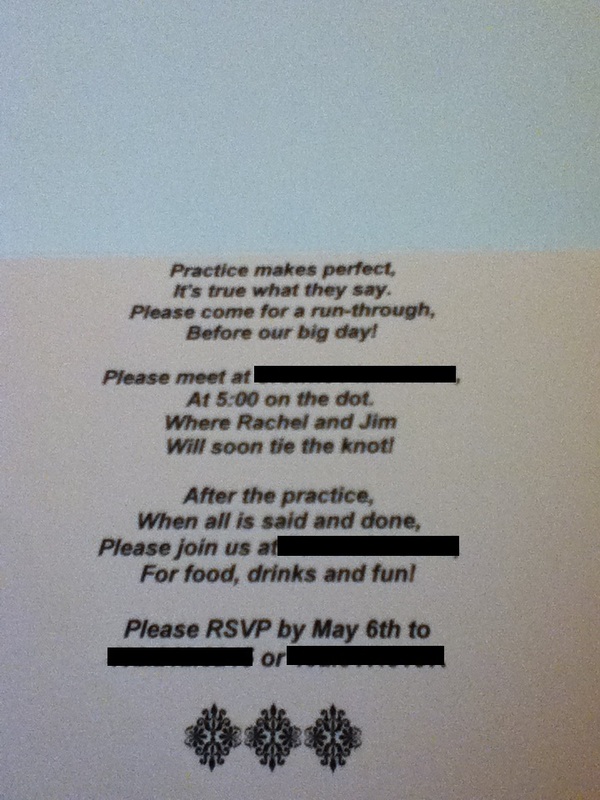
Rehearsal Dinner Invites
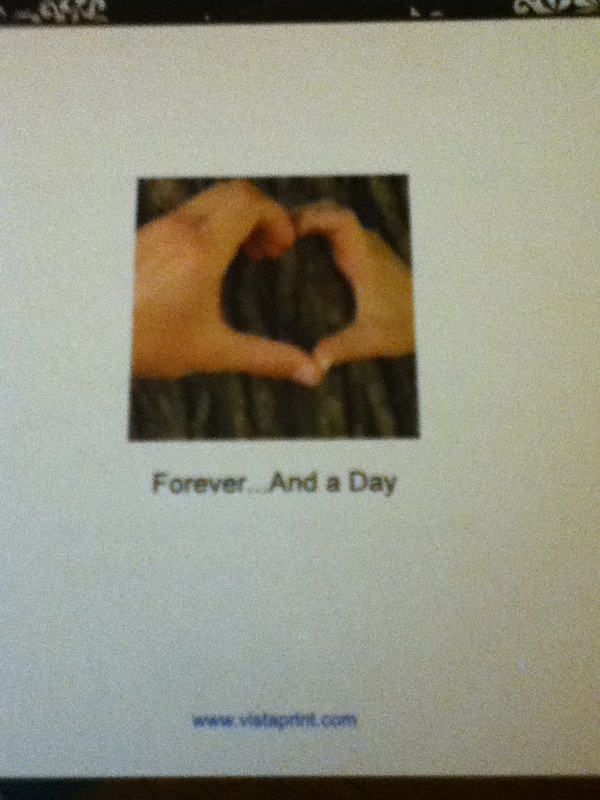
I went completely lazy on these, and just ordered them off Vista Print. I was planning on DIYing them and making them to match the wedding invitations, but we had a last minute change with the restaurant, and since I was waiting on confirmation for that and we're about a month out, I figured I'd better just get them as fast as I can once I had all the info. I needed more than 10, which they were only offering 10 for free, so I went ahead and placed the order, and figured if I used it again with a different e-mail, it would still save me a few bucks. Well, as I finalized it, I received an offer for 10 extra! Woop woop! So all I paid for was shipping, and I did order 10 extra envelopes, just in case (which I did end up needing 1 or 2!). I found this cutesy little poem online somewhere...just googled RD invites and voila! I did change it a tad. :) A colored pic was free, so I put a pic of our hands and our little saying. LOVE! I also got a free pen, so I put Kyle's name on it and a violin pic. Sadly, he'll probably like it more than his other gift.:)
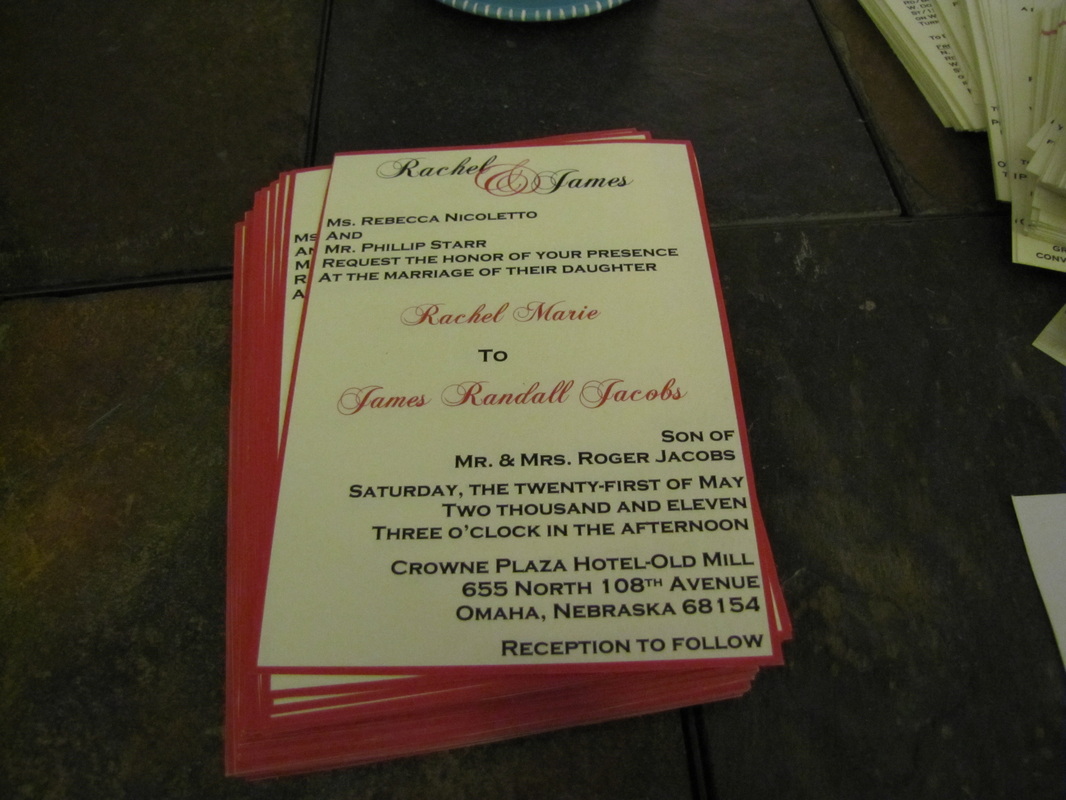
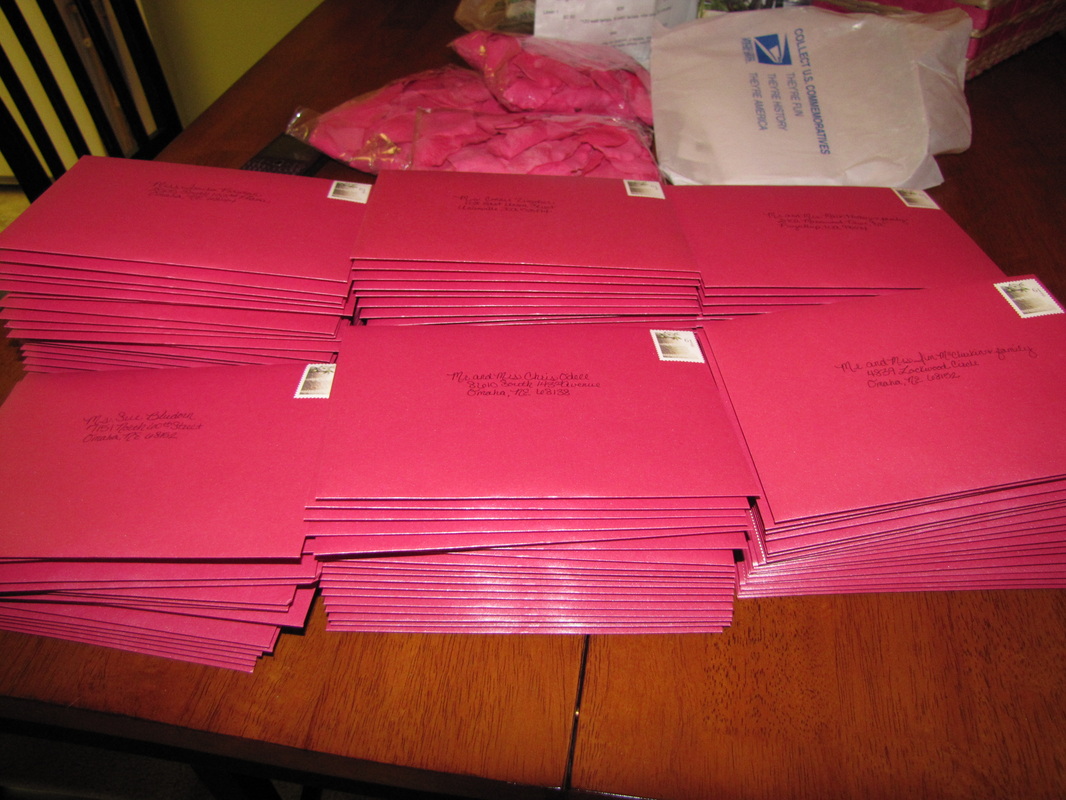
Invitations!
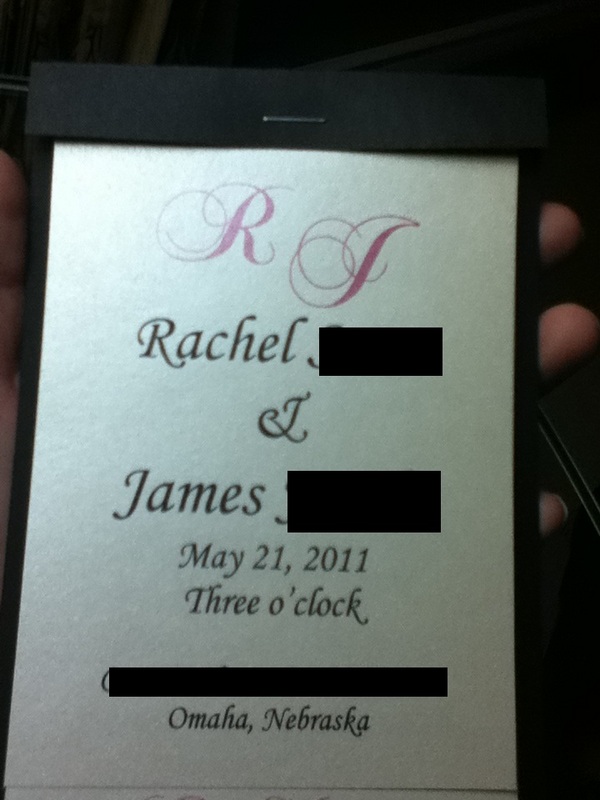
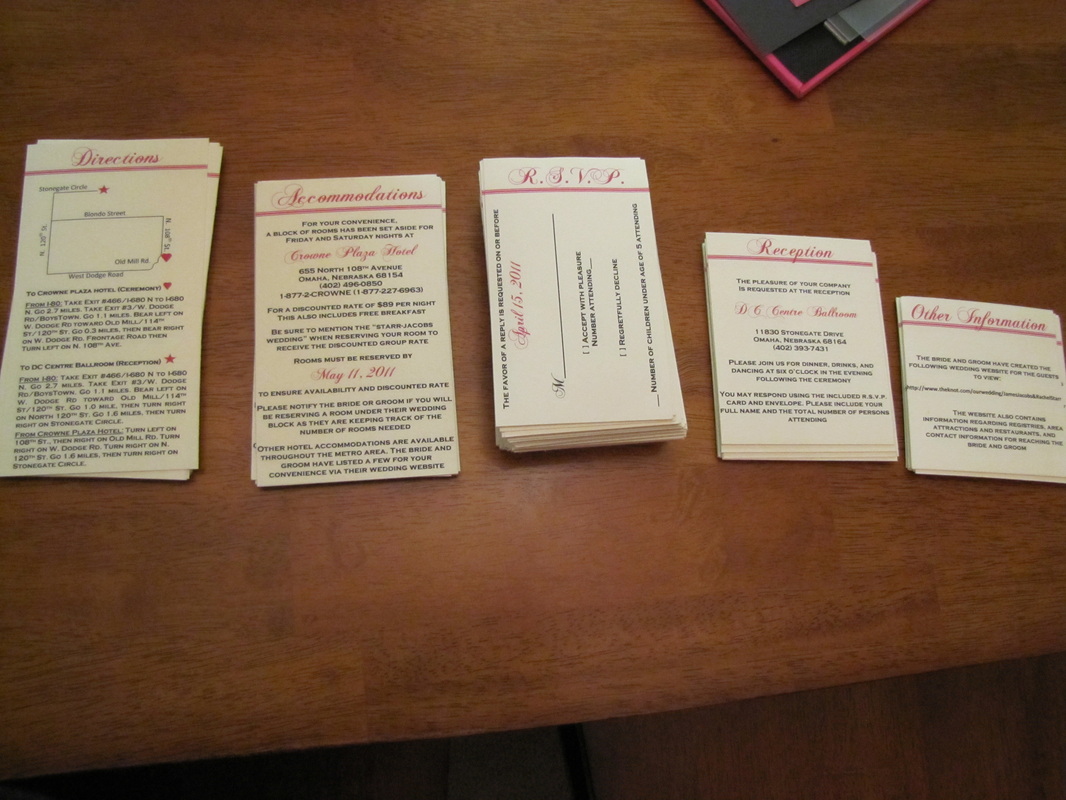
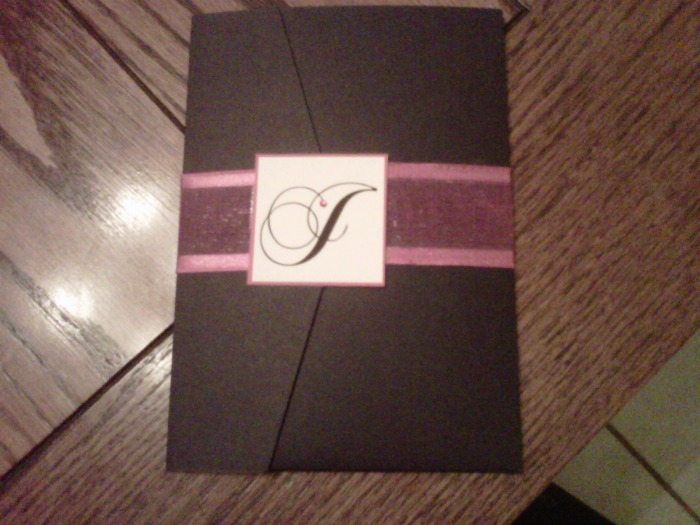
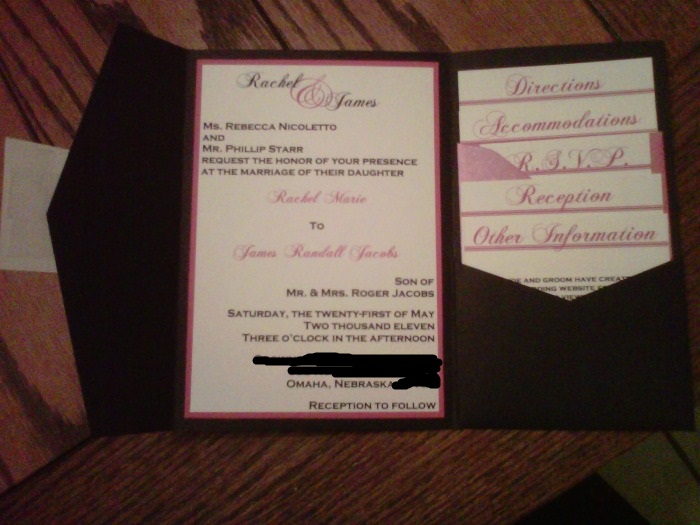
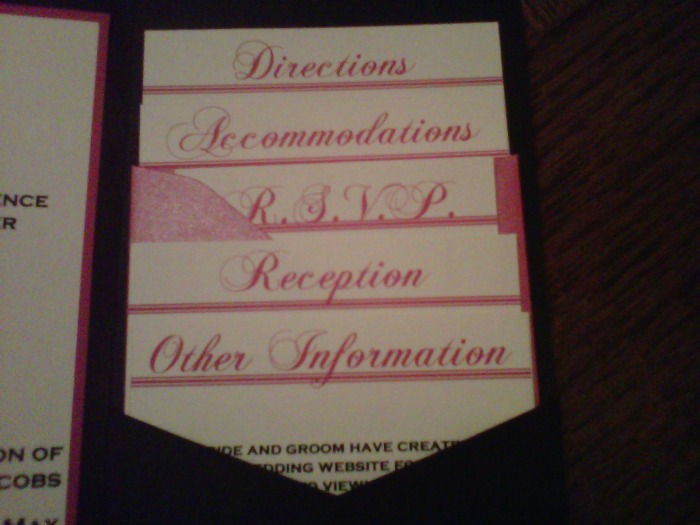
Well, here they are! They're pretty much done (just need to print and cut the inserts when we're closer to our date). The only thing that we did not make are the envelopes...and the ribbon. :) We figured the entire thing including the mailing envelope (except postage) is around $1 a piece.
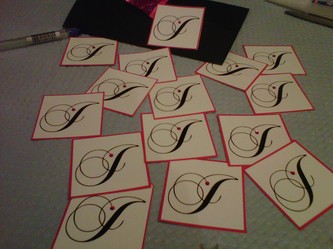
I bought black 12X12 cardstock from Michaels, creme delux text weight paper from Archiver's, the ribbon from Hobby Lobby, the rhinestones from JoAnn's, the RSVP envelopes from Cards and Pockets, and the (ugly) mailing envelope from eBay. I used rubber cement, double-sided tape, a fiskers cutter, a boning tool, and lots of Excedrin. :) Jim (being the wonderful man that he is) helped me make all the pocketfolds! He actually made his own template by looking at what I'd found online and messing around with it himself. He did it perfectly the first time and they're exactly what I wanted! So, once he showed me how to score and cut the paper, I took on that job and he did the angle-cutting (which he did by hand!). The I did the gluing (I used rubber cement, and I curse it everytime I see the bottle!) and boning, cut the ribbon (which was wired, so I often had to trim the wire if it poked out) and used double-sided tape to secure it every so often. Then I used the tape again to secure the 2x2 I made on the front. To make these, I just printed and cut them and glued a small iron-on crystal (which were on clearance) and had to push REALLY hard with my finger or thumb (which became a PITA, but I love them!) I used the double-sided tape to secure the invitation down and placed all the inserts and the RSVP envelope in the pocket.
I CANNOT believe we MADE these...from SCRATCH! Seriously! If I can do it, ANYONE can do it!

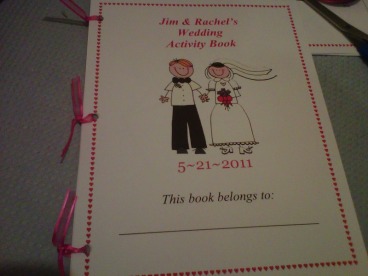
Activity Books!!!
We will be inviting a lot of children, so I knew from the beginning that I wanted coloring books and crayons for the children at the reception to keep them (somewhat) entertained. I liked the idea of the books being personalized. I found a template online and used that as my base, then I just added a few pictures I found, added some puzzles/graphics/pictures of my own, printed everything but the cover on computer paper, and voila! I used 65lb white cardstock for the front and back covers to keep the computer paper from ripping. I couldn’t decide what I wanted to do to bind the book together. I had seen some people use yarn, one bride hot glued every single page (oh my), and a few other ideas. I had some old yarn at home and tried it. Hated it! I was at Michael’s and saw a fuscia/pink colored narrow ribbon that I liked. I grabbed a couple and figured what the heck. I three-hole punched the pages and tied them together. LOVE IT! I did find that I had to make the knots somewhat loose, or the pages won’t turn well, and I’m afraid some kids will tear up their books. I’m sure that will happen anyway, but I’m a perfectionist. I will probably buy the small boxes of crayons in bulk and give one to each child. I don't think a children's table will work...most parents will probably want to be near their child....at least I would assume so. ?!